In online business, email signatures are like your business card. And I bet you’ve seen some terrible ones. Yep, me too!
It seems like such a small thing, but when that very first email goes out to a prospective client, you need to make sure that your email signature:
- Communicates that you’re a professional who has their act together.
- Tells them exactly what they need to know, without a lot of extra clutter.
Email signatures are such a big deal that email signature generators (some with fees!) have become a whole industry! But before you give away actual money just to get a decent-looking email signature, let me show you how to quickly and easily create an attractive Gmail Signature using Google Docs. FOR FREE.
If you’re using Google Workspace, the professional version of Gmail, this will work for you too!
Tips for designing a professional email signature.
- Don’t include every possible way to contact you. Keep it simple and include only your 2-3 most important links.
- Don’t include your email address! If they’re reading an email from you, they have your email address. Waste of space.
- Keep it small and simple for mobile. Remember, things get squished on mobile and the more complex your signature is, the worse it will look on smartphones. Don’t use large images and keep fonts around 12 points or smaller.
- Don’t put your entire email signature in an image. Sure, a graphic will let you style your signature exactly how you want, but it’s not searchable in people’s mailboxes and it’s not accessible to folks with visual impairments who use screen readers.
- Don’t bother with fancy fonts. Google Docs has loads of fonts to choose from, but Gmail only has a few. If you use a font in your Google Doc that isn’t supported by Gmail, Gmail is going to substitute a different font.
These are the fonts available to you in Gmail. Stick with one of these when prepping your signature in Google Docs:
- Sans Serif (Arial)
- Serif (Times New Roman)
- Fixed Width (Monospace)
- Wide (Arial Black)
- Narrow (Arial Narrow)
- Comic Sans MS
- Garamond
- Georgia
- Tahoma
- Trebuchet MS
- Verdana
Wanna skip the tutorial and just grab my email signature template? Here’s my editable Google Doc!
TUTORIAL: How to Create a Professional Gmail Signature for FREE using Google Docs.
This process works for both free Gmail accounts and Google Workspace (professional) accounts.
1. Open up a new Google Document and add a table.
Click on Insert > Table and add a 2×1 table.
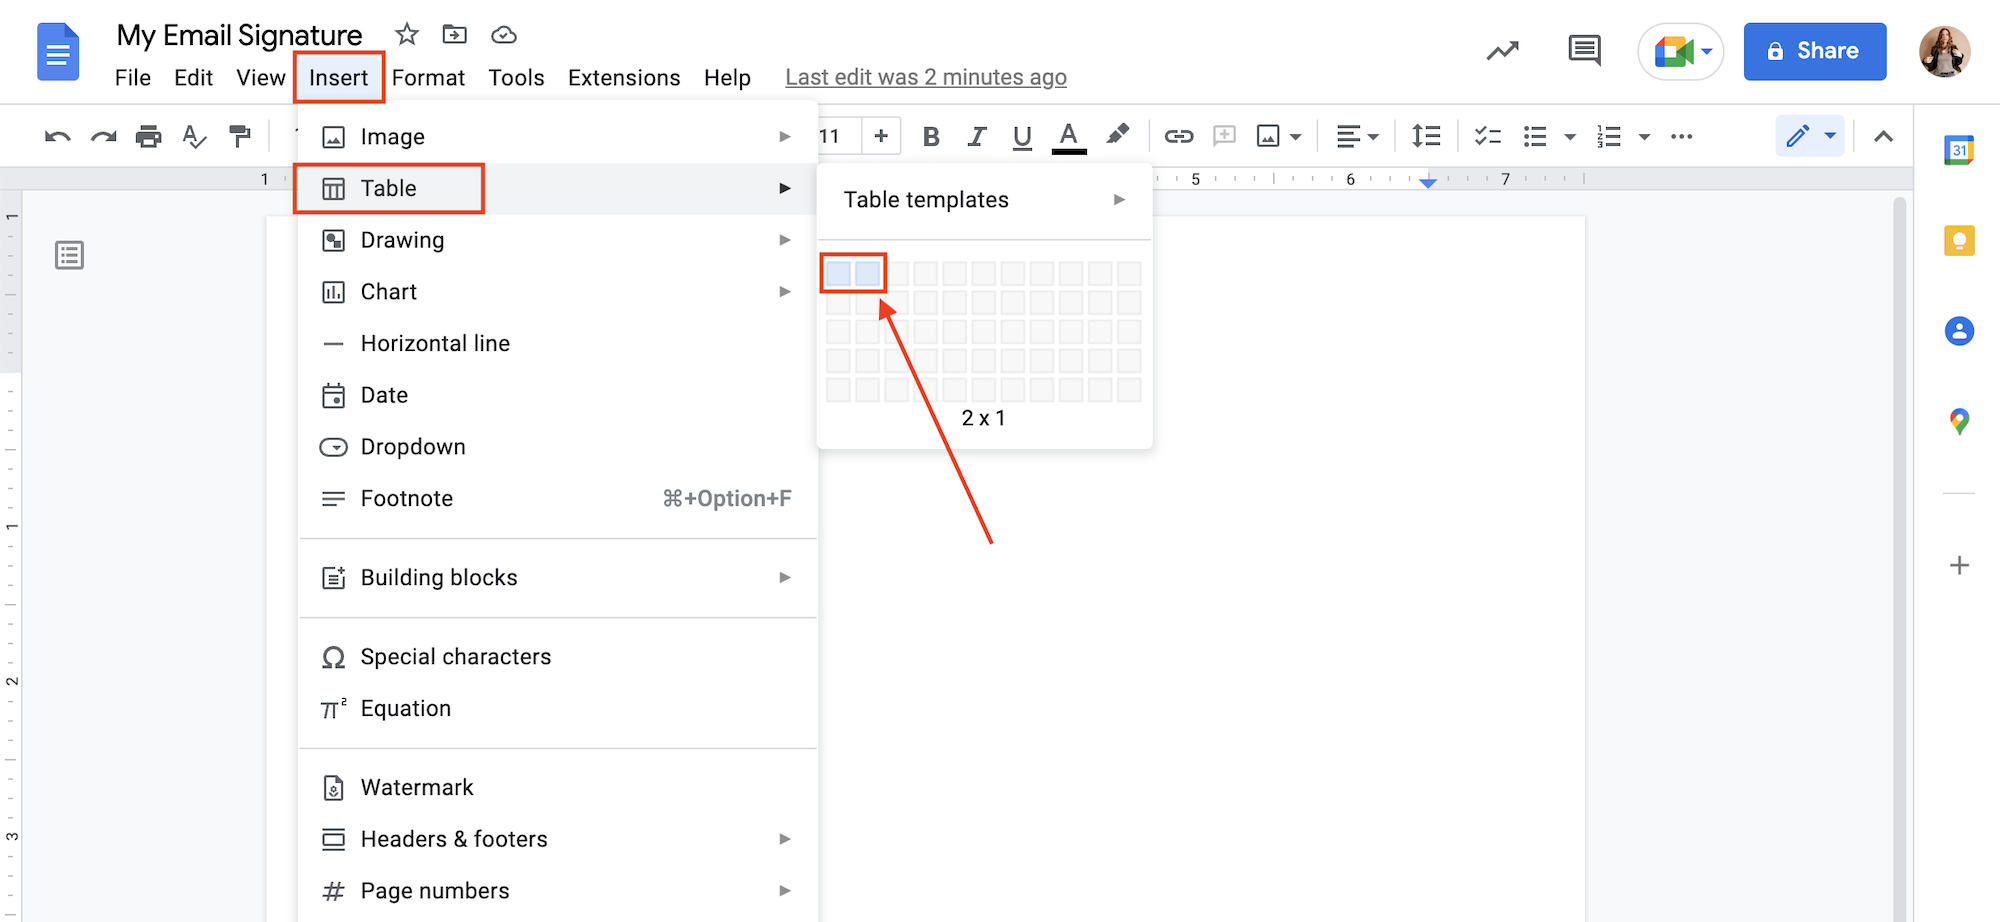
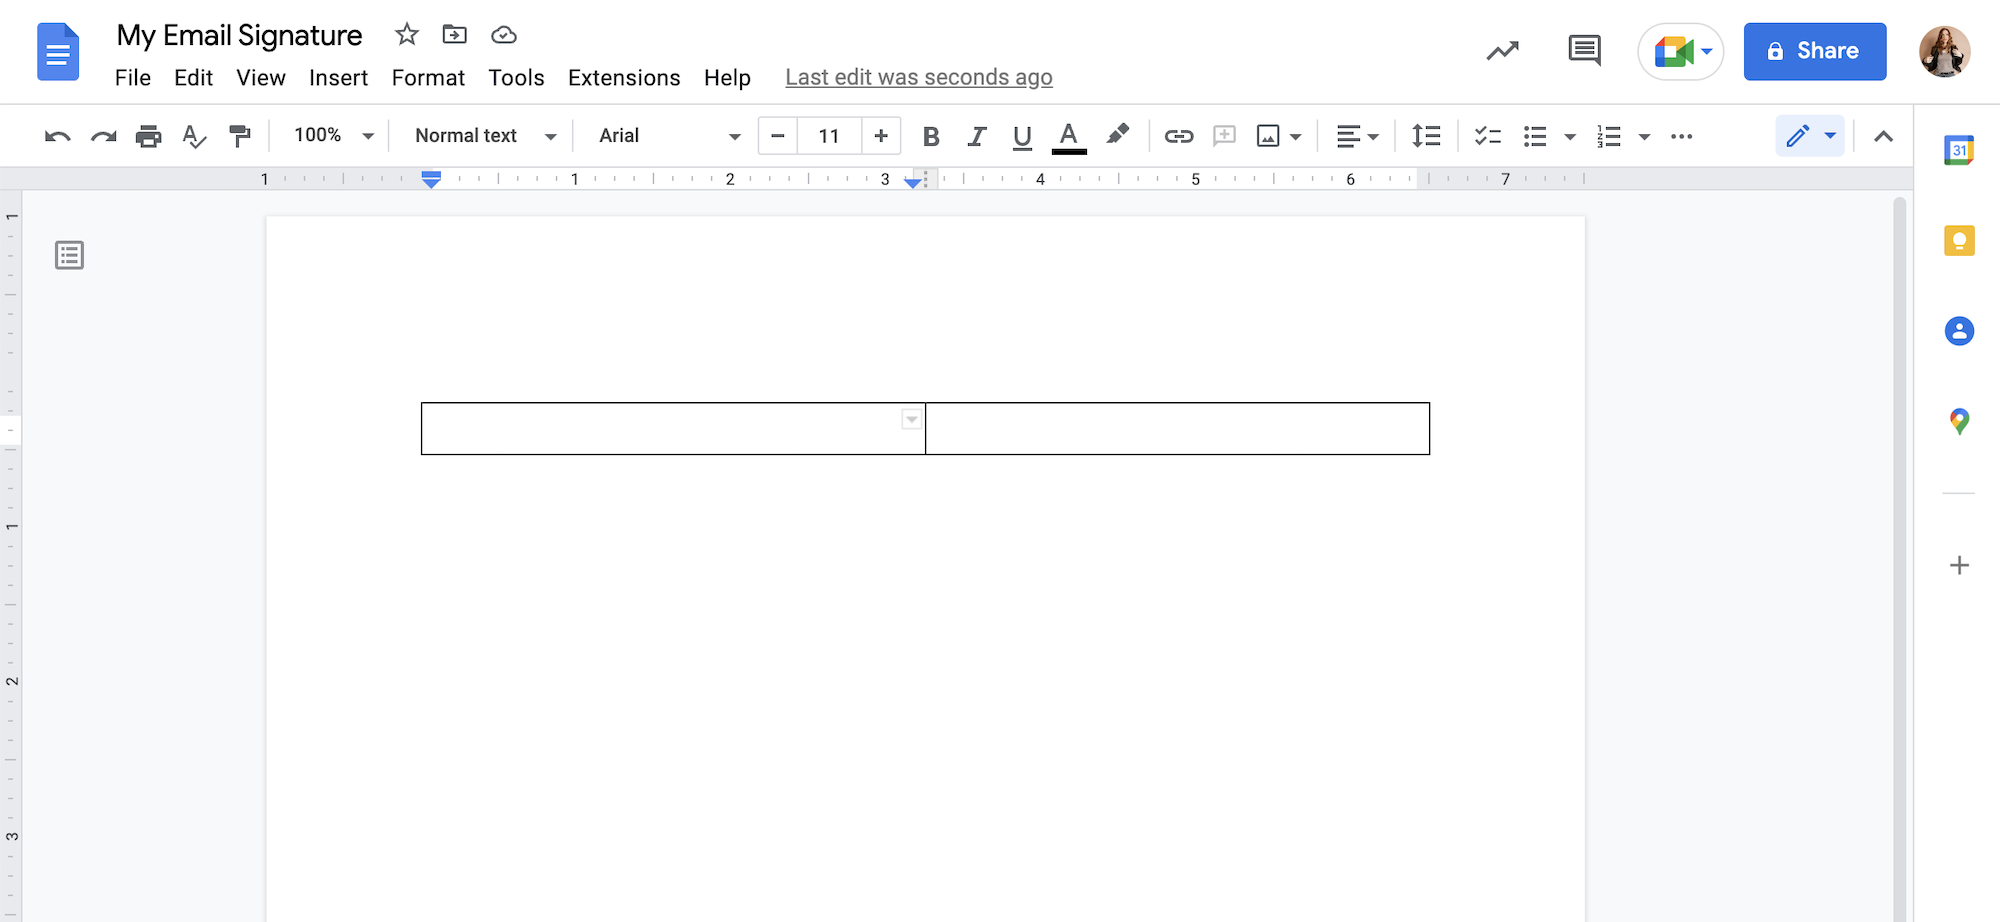
You’ll end up with a table that looks like this. This is where we’ll build our new email signature.
2. Add your email signature content inside the table.
Keep it simple. My signature only contains my photo, name, tagline, and a few links. If you’re a brick-and-mortar business, you might include a phone number and address instead, or a logo instead of a photo.
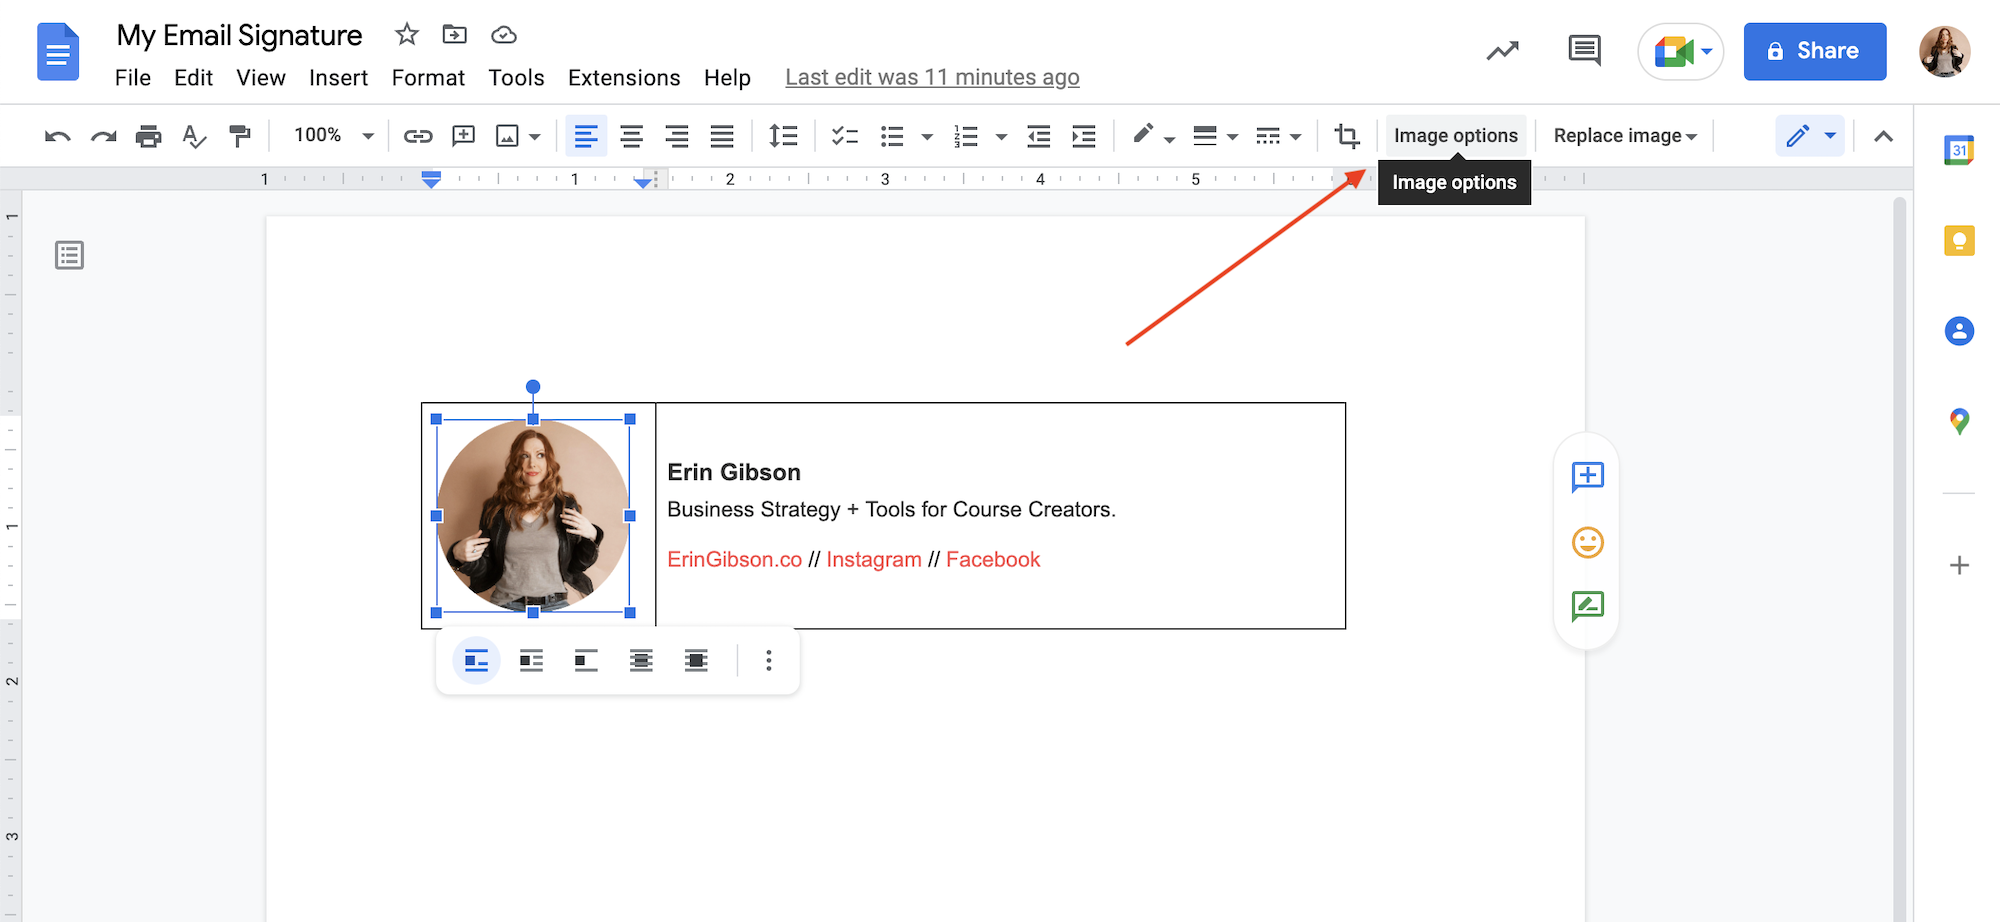
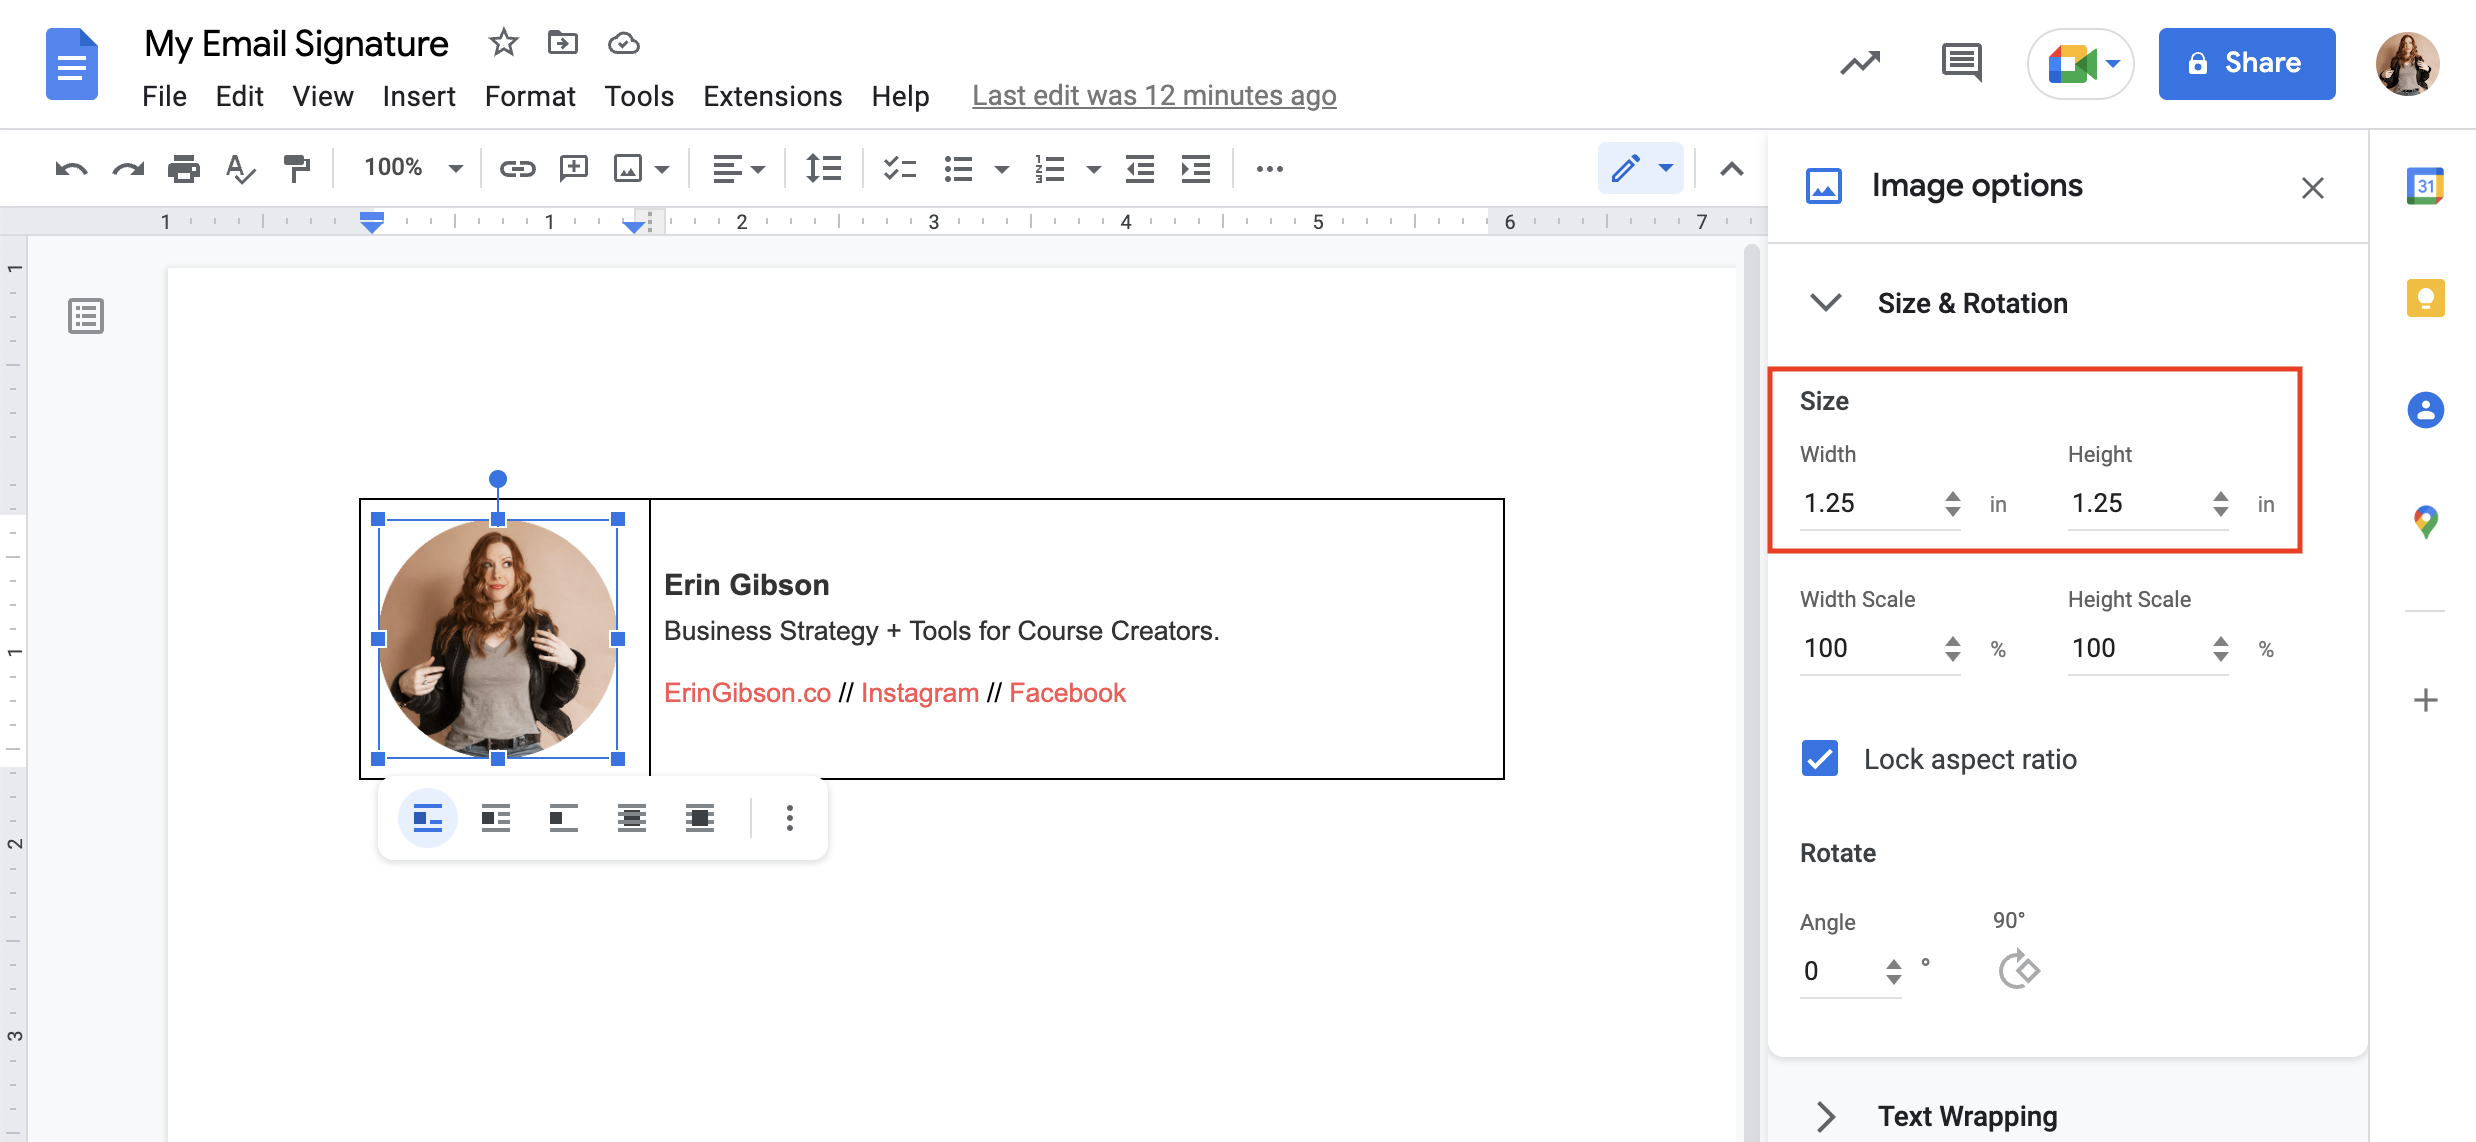
Select your image and click Image options to adjust the size of your image, or just grab the handles at the corner of your image and drag to resize. I set mine to 1.25 inches.
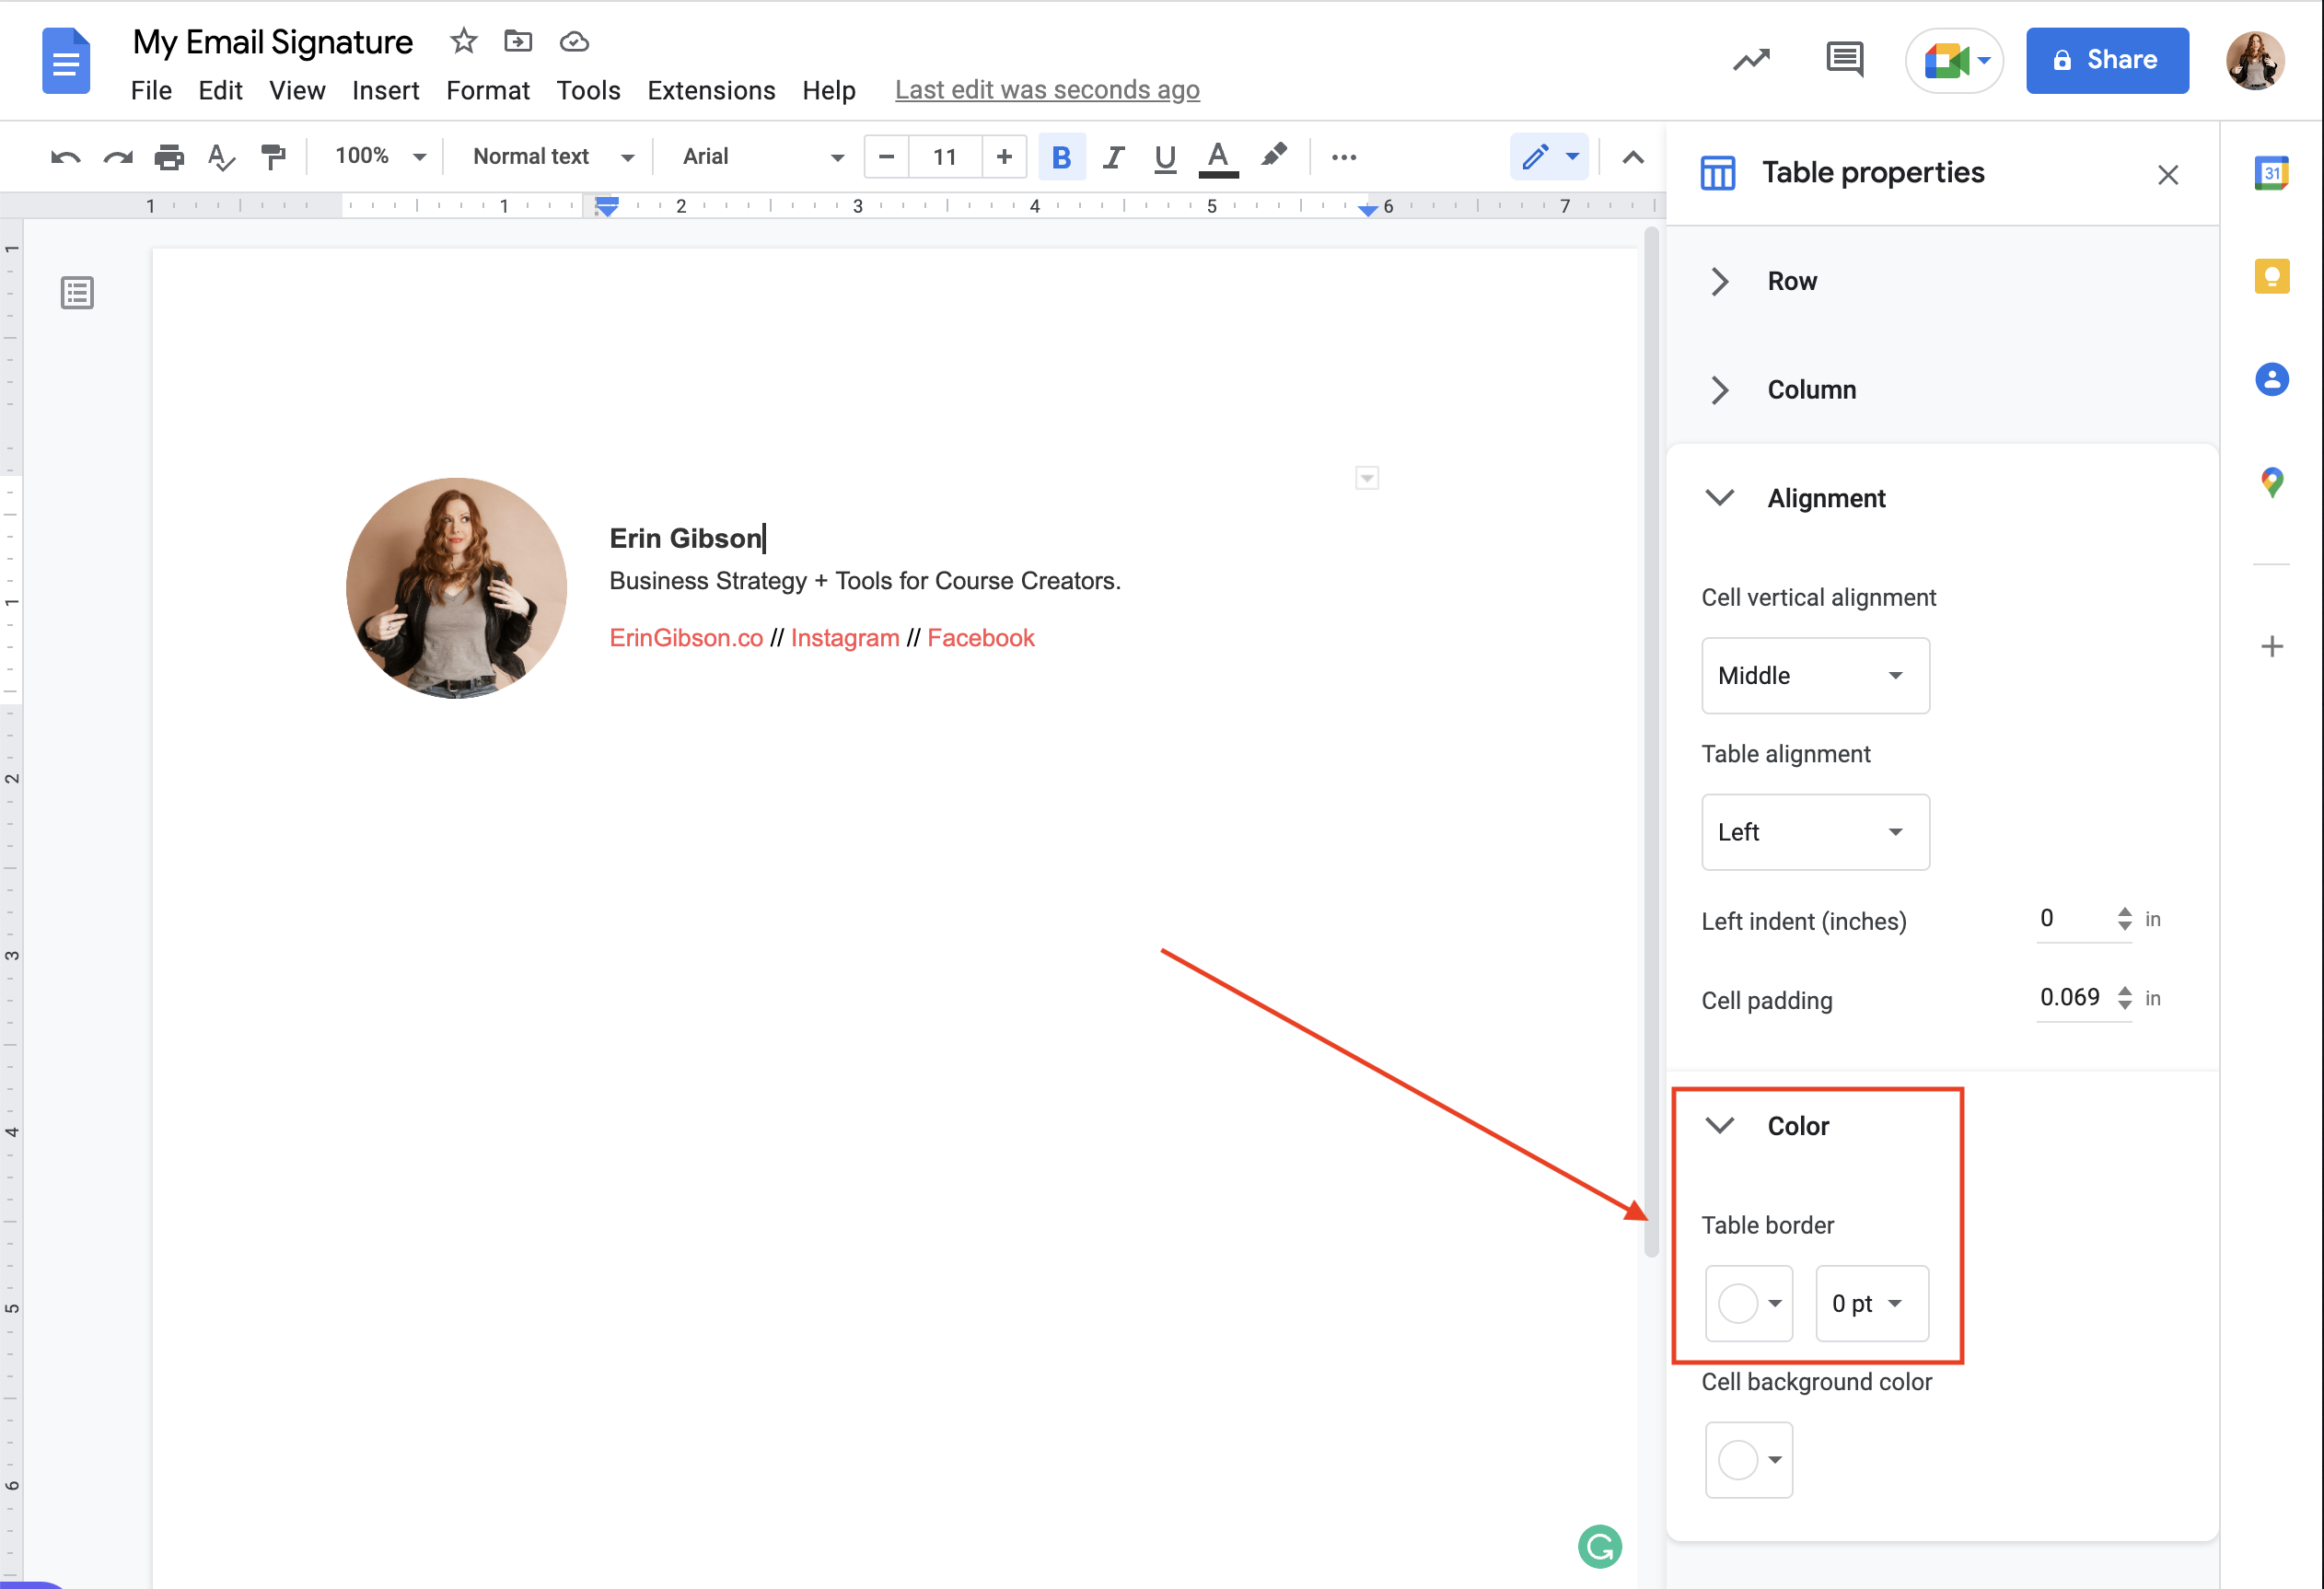
3. Edit the table properties and remove the border.
Right-click anywhere inside the table and select Table Properties.
I like my text centered vertically next to my photo, so I change Cell vertical alignment to Middle.

Next, we’ll change the Table border to white and set it to 0 points.
If you like the way your signature looks at this point, you can stop designing here! Jump to step 5.
However, I want to visually separate my email signature from the body of my emails, so I’m going to add a horizontal line above it.
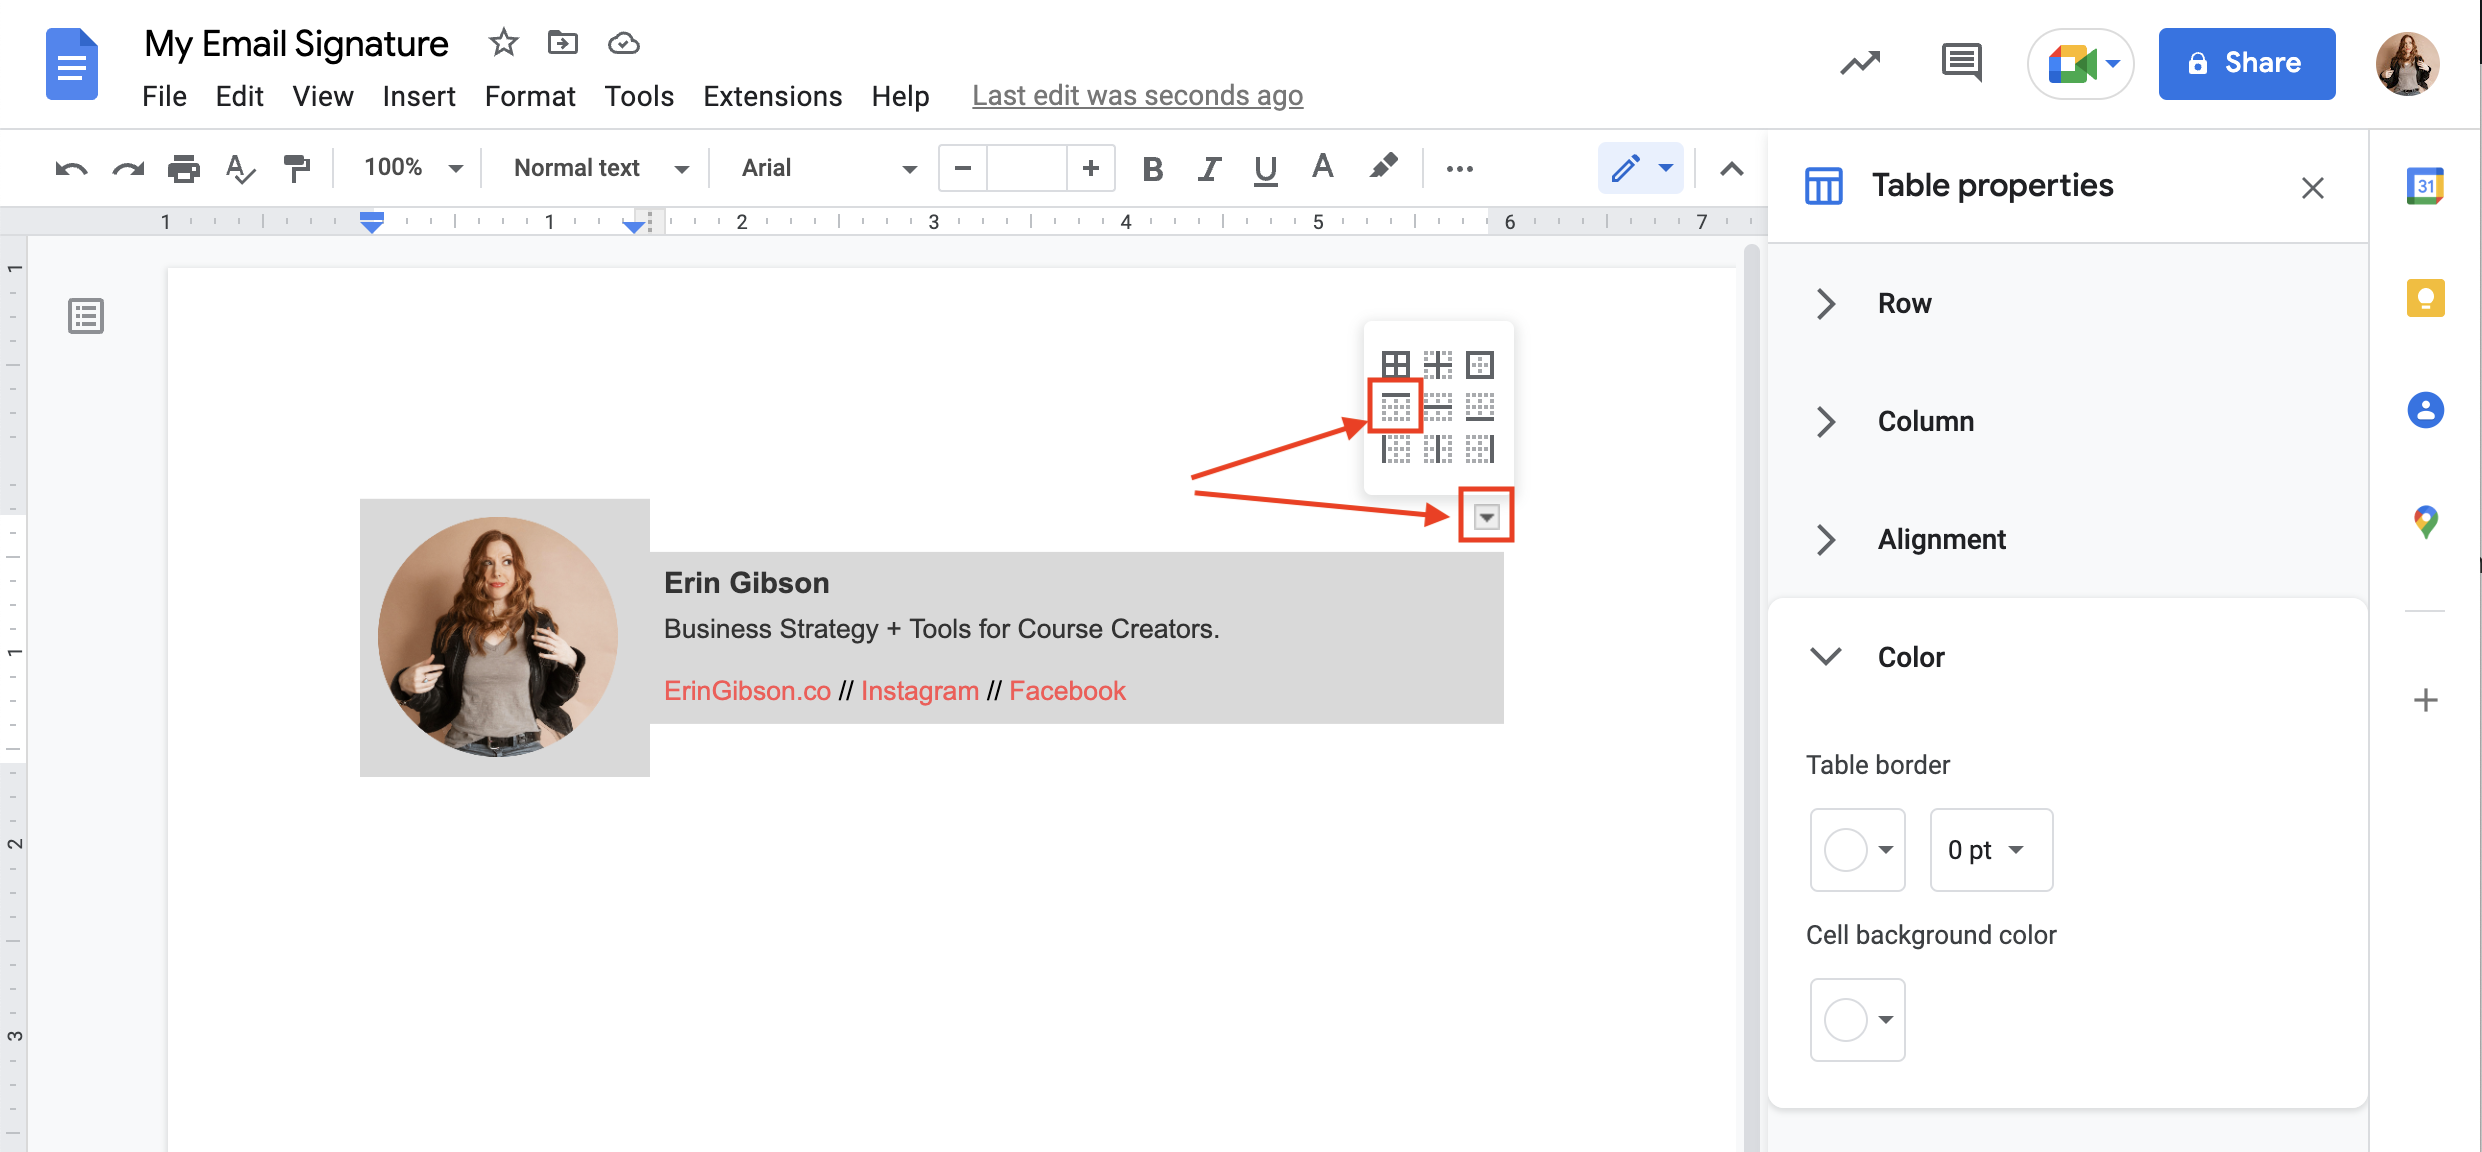
4. Add a border to the top of your table
Select the entire table by clicking in one cell and dragging across to the other cell. You should see the content of both cells highlighted. Then, click the little arrow in the upper right corner and select the option for a top border.
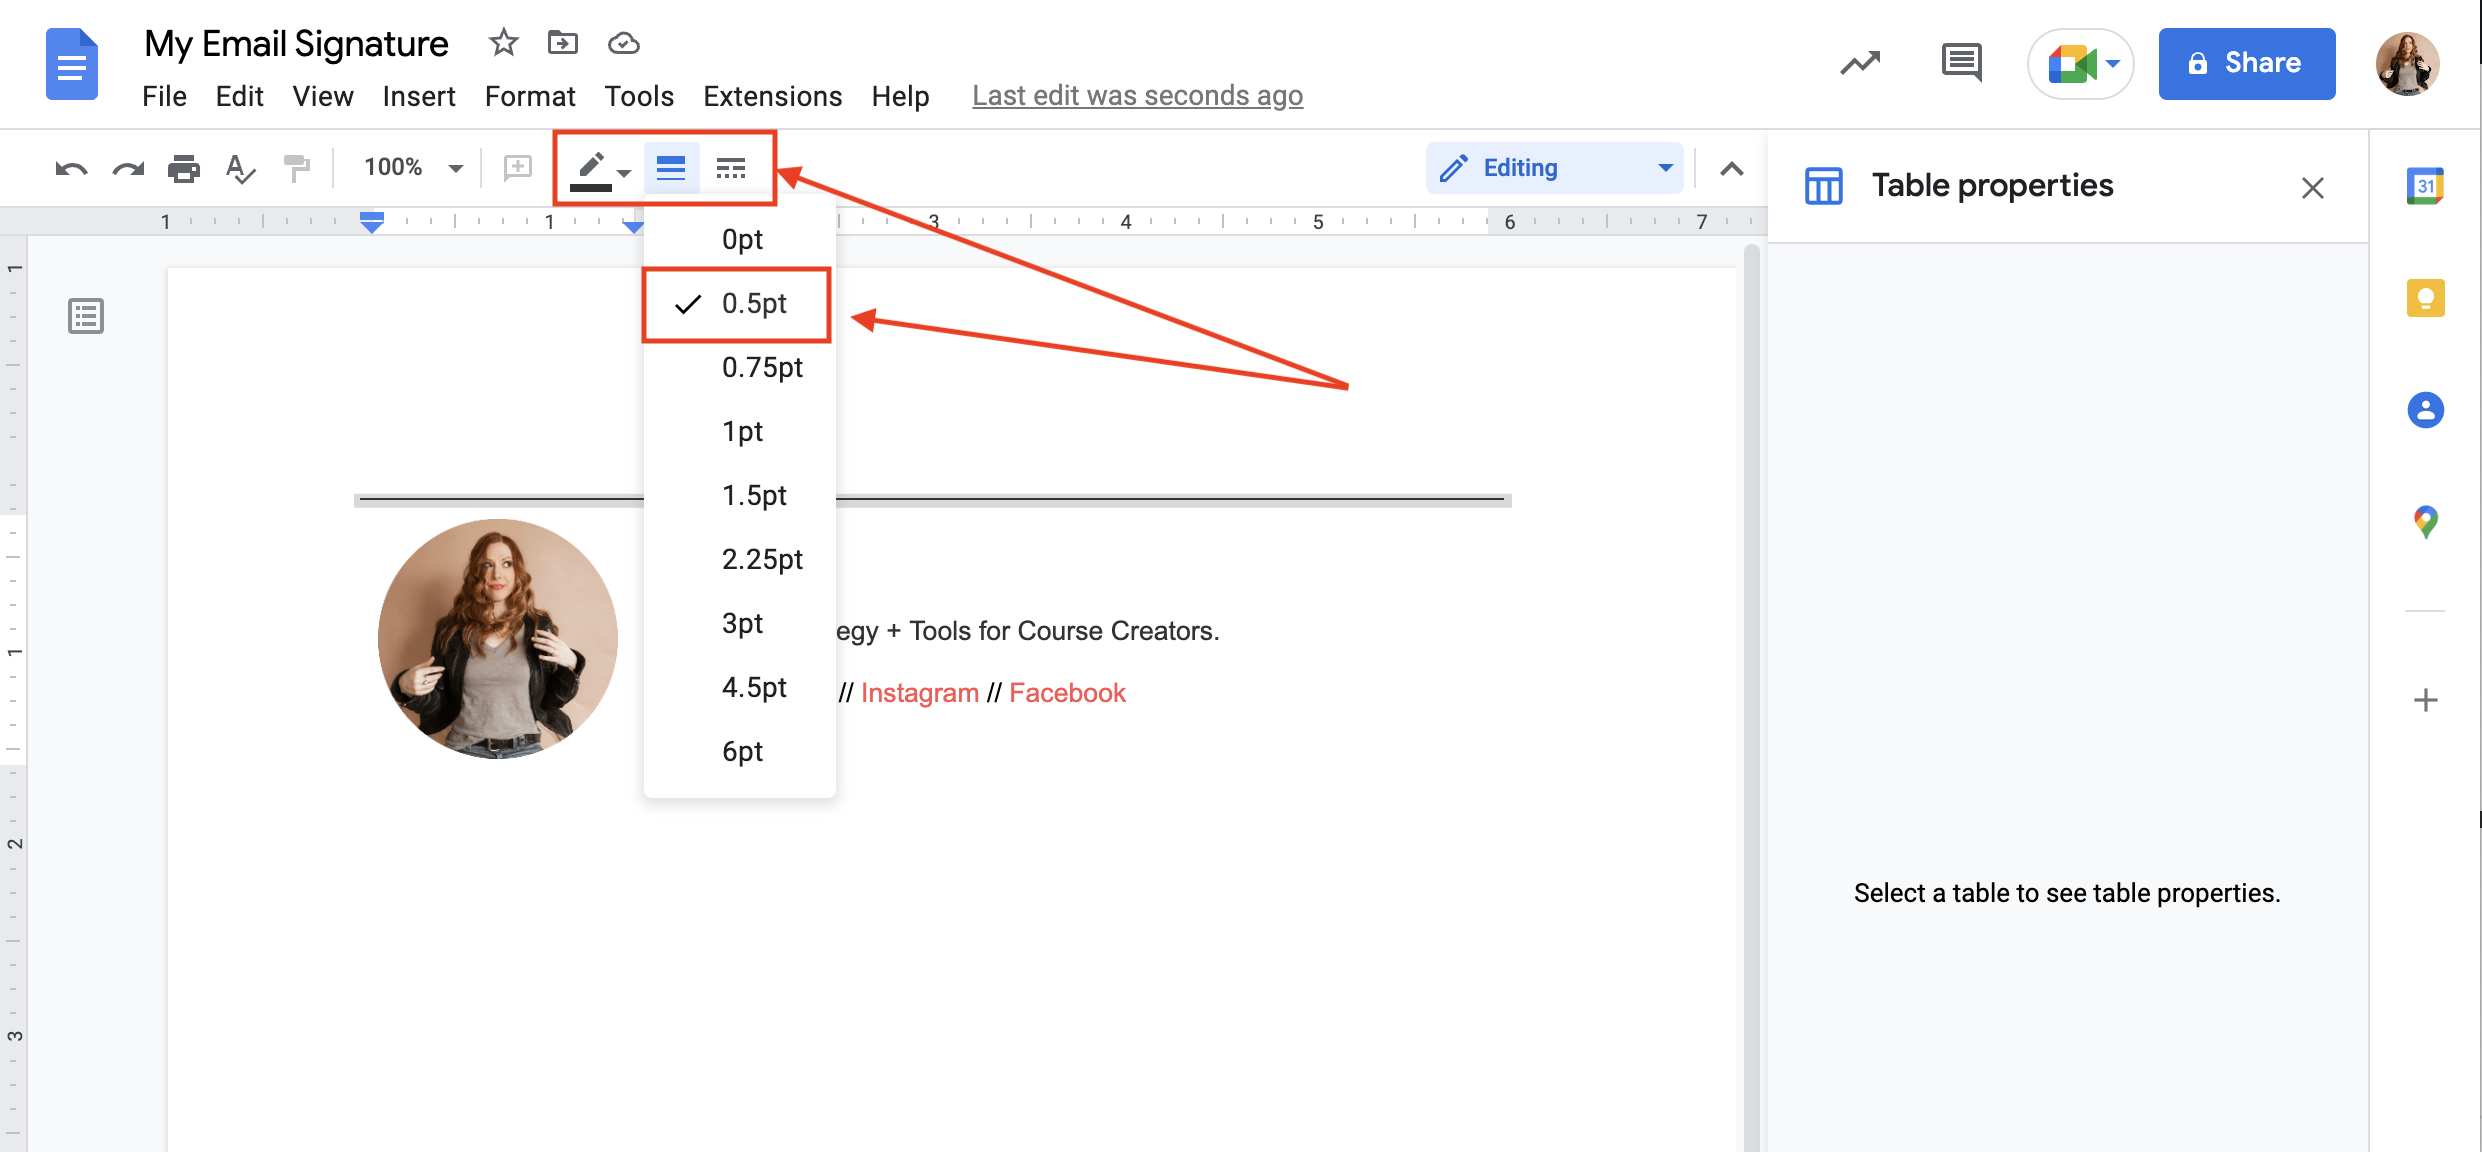
When you do this, a menu will appear at the top of the document to let you style this border. The important things to adjust here are the Border color and Border width because we cleared those out for the entire table in the previous step.
You also have the option to use a solid, dotted, or dashed line.
5. Copy your email signature from your Google Doc and paste it into Gmail.
Now that we’ve got it looking lovely, we’re going to copy our signature from our Google Doc and paste it into Gmail. The Gmail signature editor doesn’t allow us to create tables or do all of this formatting, but it will allow us to paste it in.
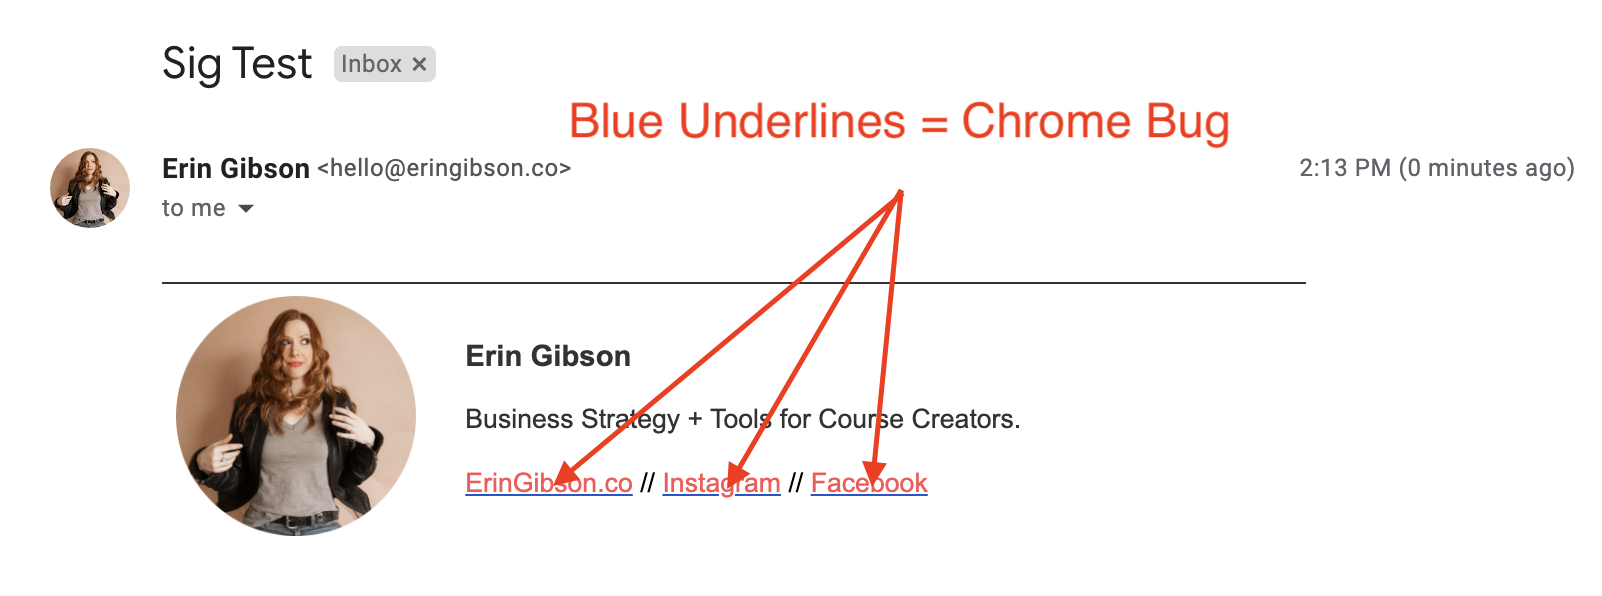
NOTE FOR GOOGLE CHROME USERS: There is a BUG in Chrome that may cause blue underlines to appear under the links in your signature even if they’re not in your Google Doc (you won’t see them until you send a test email).
SOLUTION: This bug is actually in the copy/paste functionality, NOT the signature itself. Simply use a different browser (Firefox, Safari, etc.) to do this step. Then you can switch back to Chrome and your signature should appear correctly.
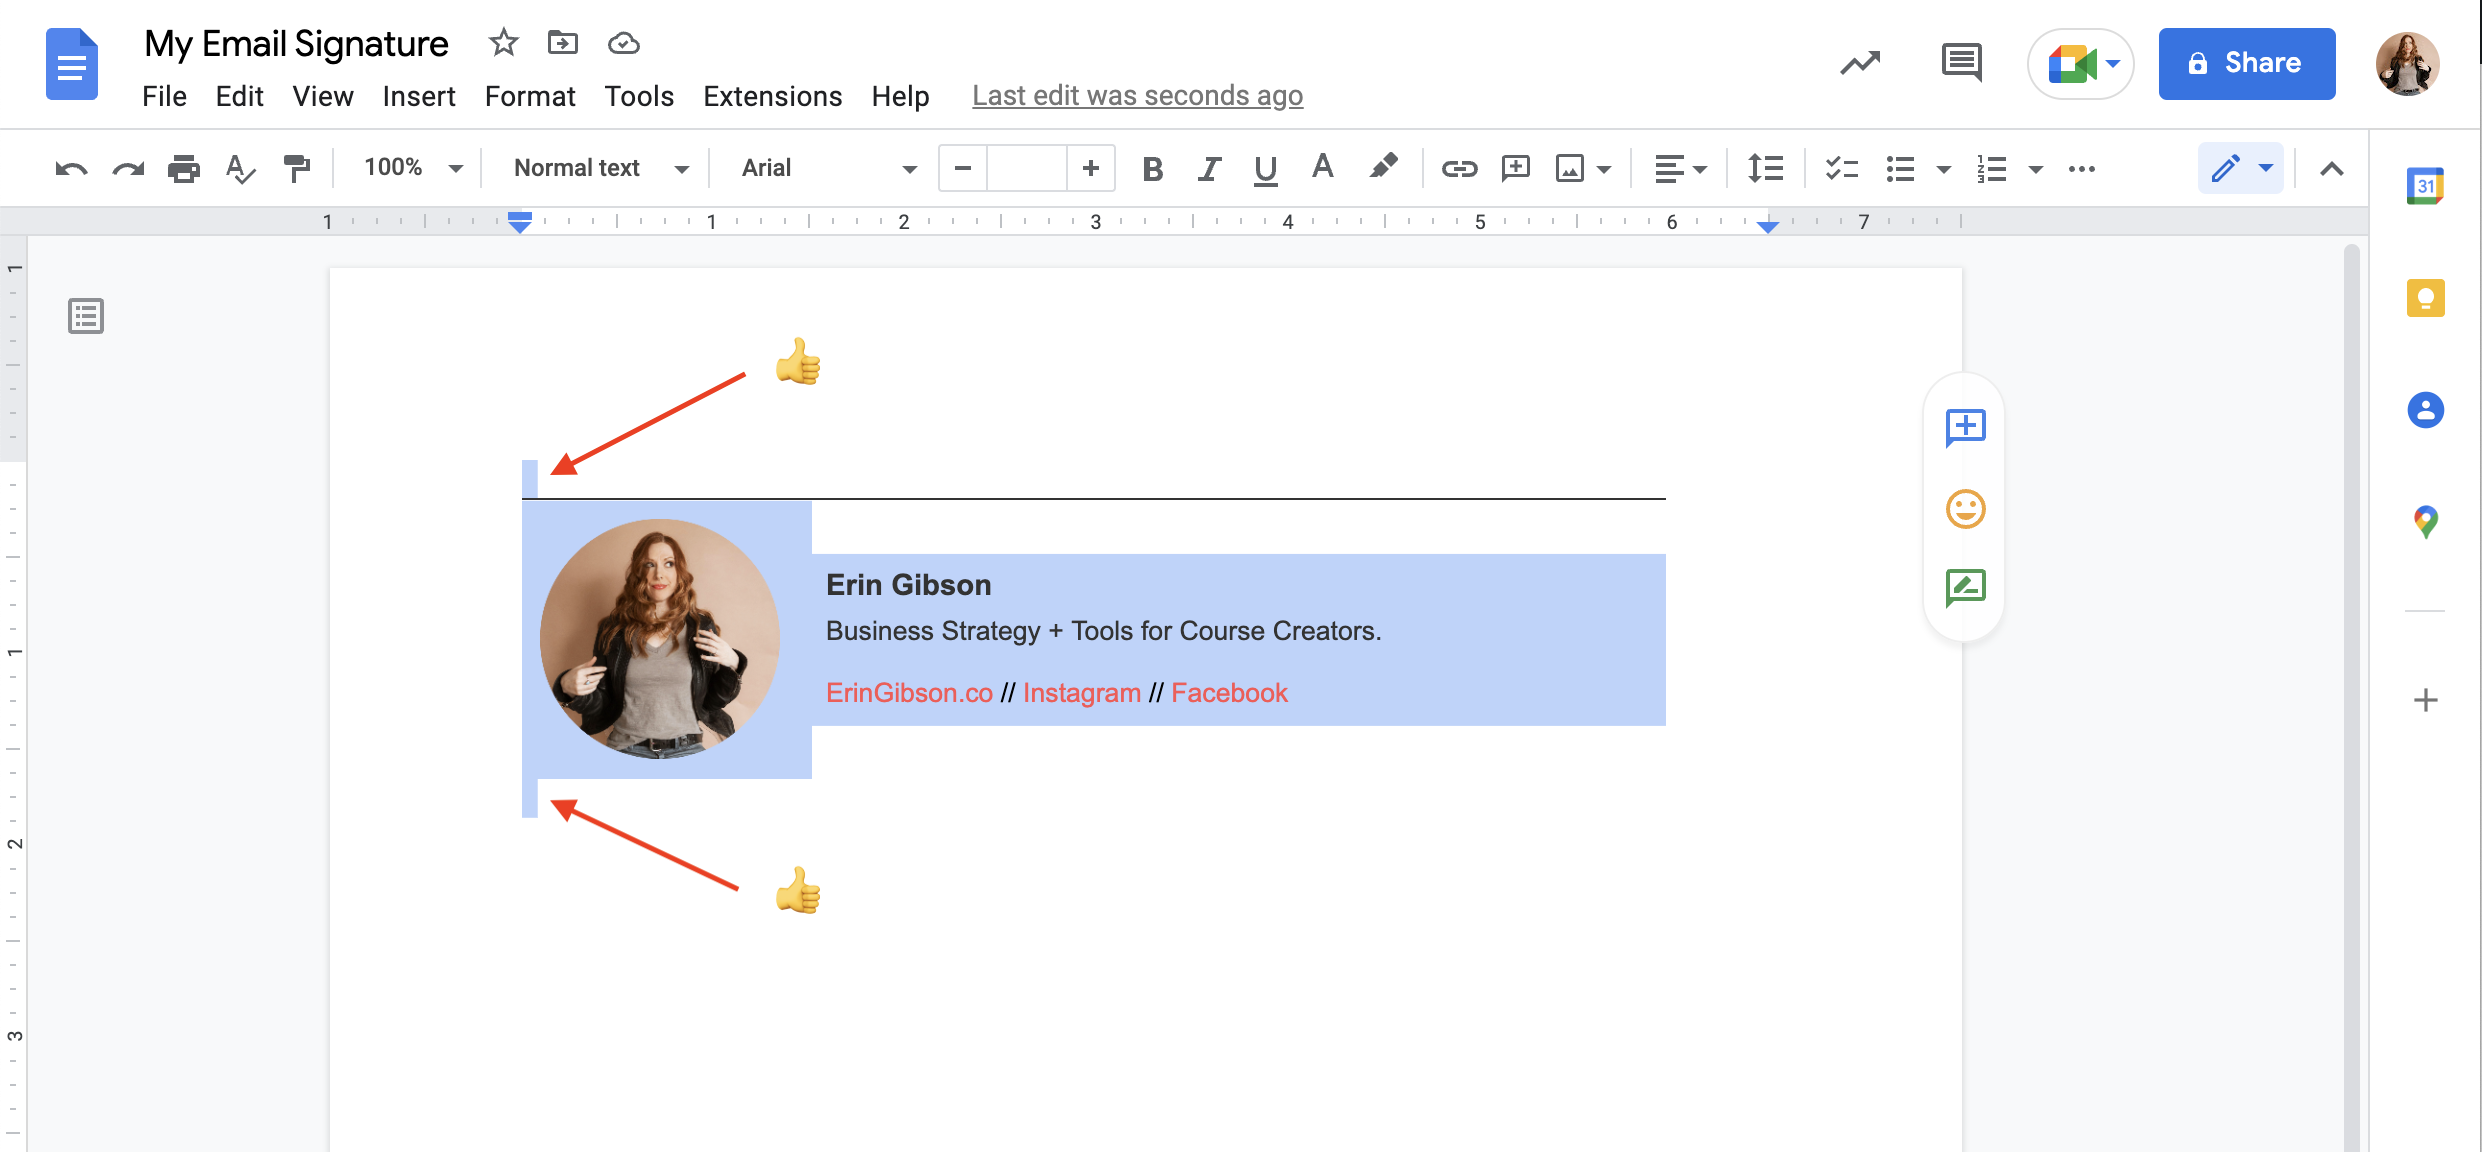
Select the entire table in your Google Doc—not just the contents of the table. But we made the table invisible, so this is tricky!
Your highlight should look like the image below. If you don’t see those two skinny little blips of highlighted space above and below, you don’t have the entire table highlighted. If you see more highlighting than this above or below your signature, you probably have some stray returns in your document that you should delete. Once you’ve got it highlighted, copy it.
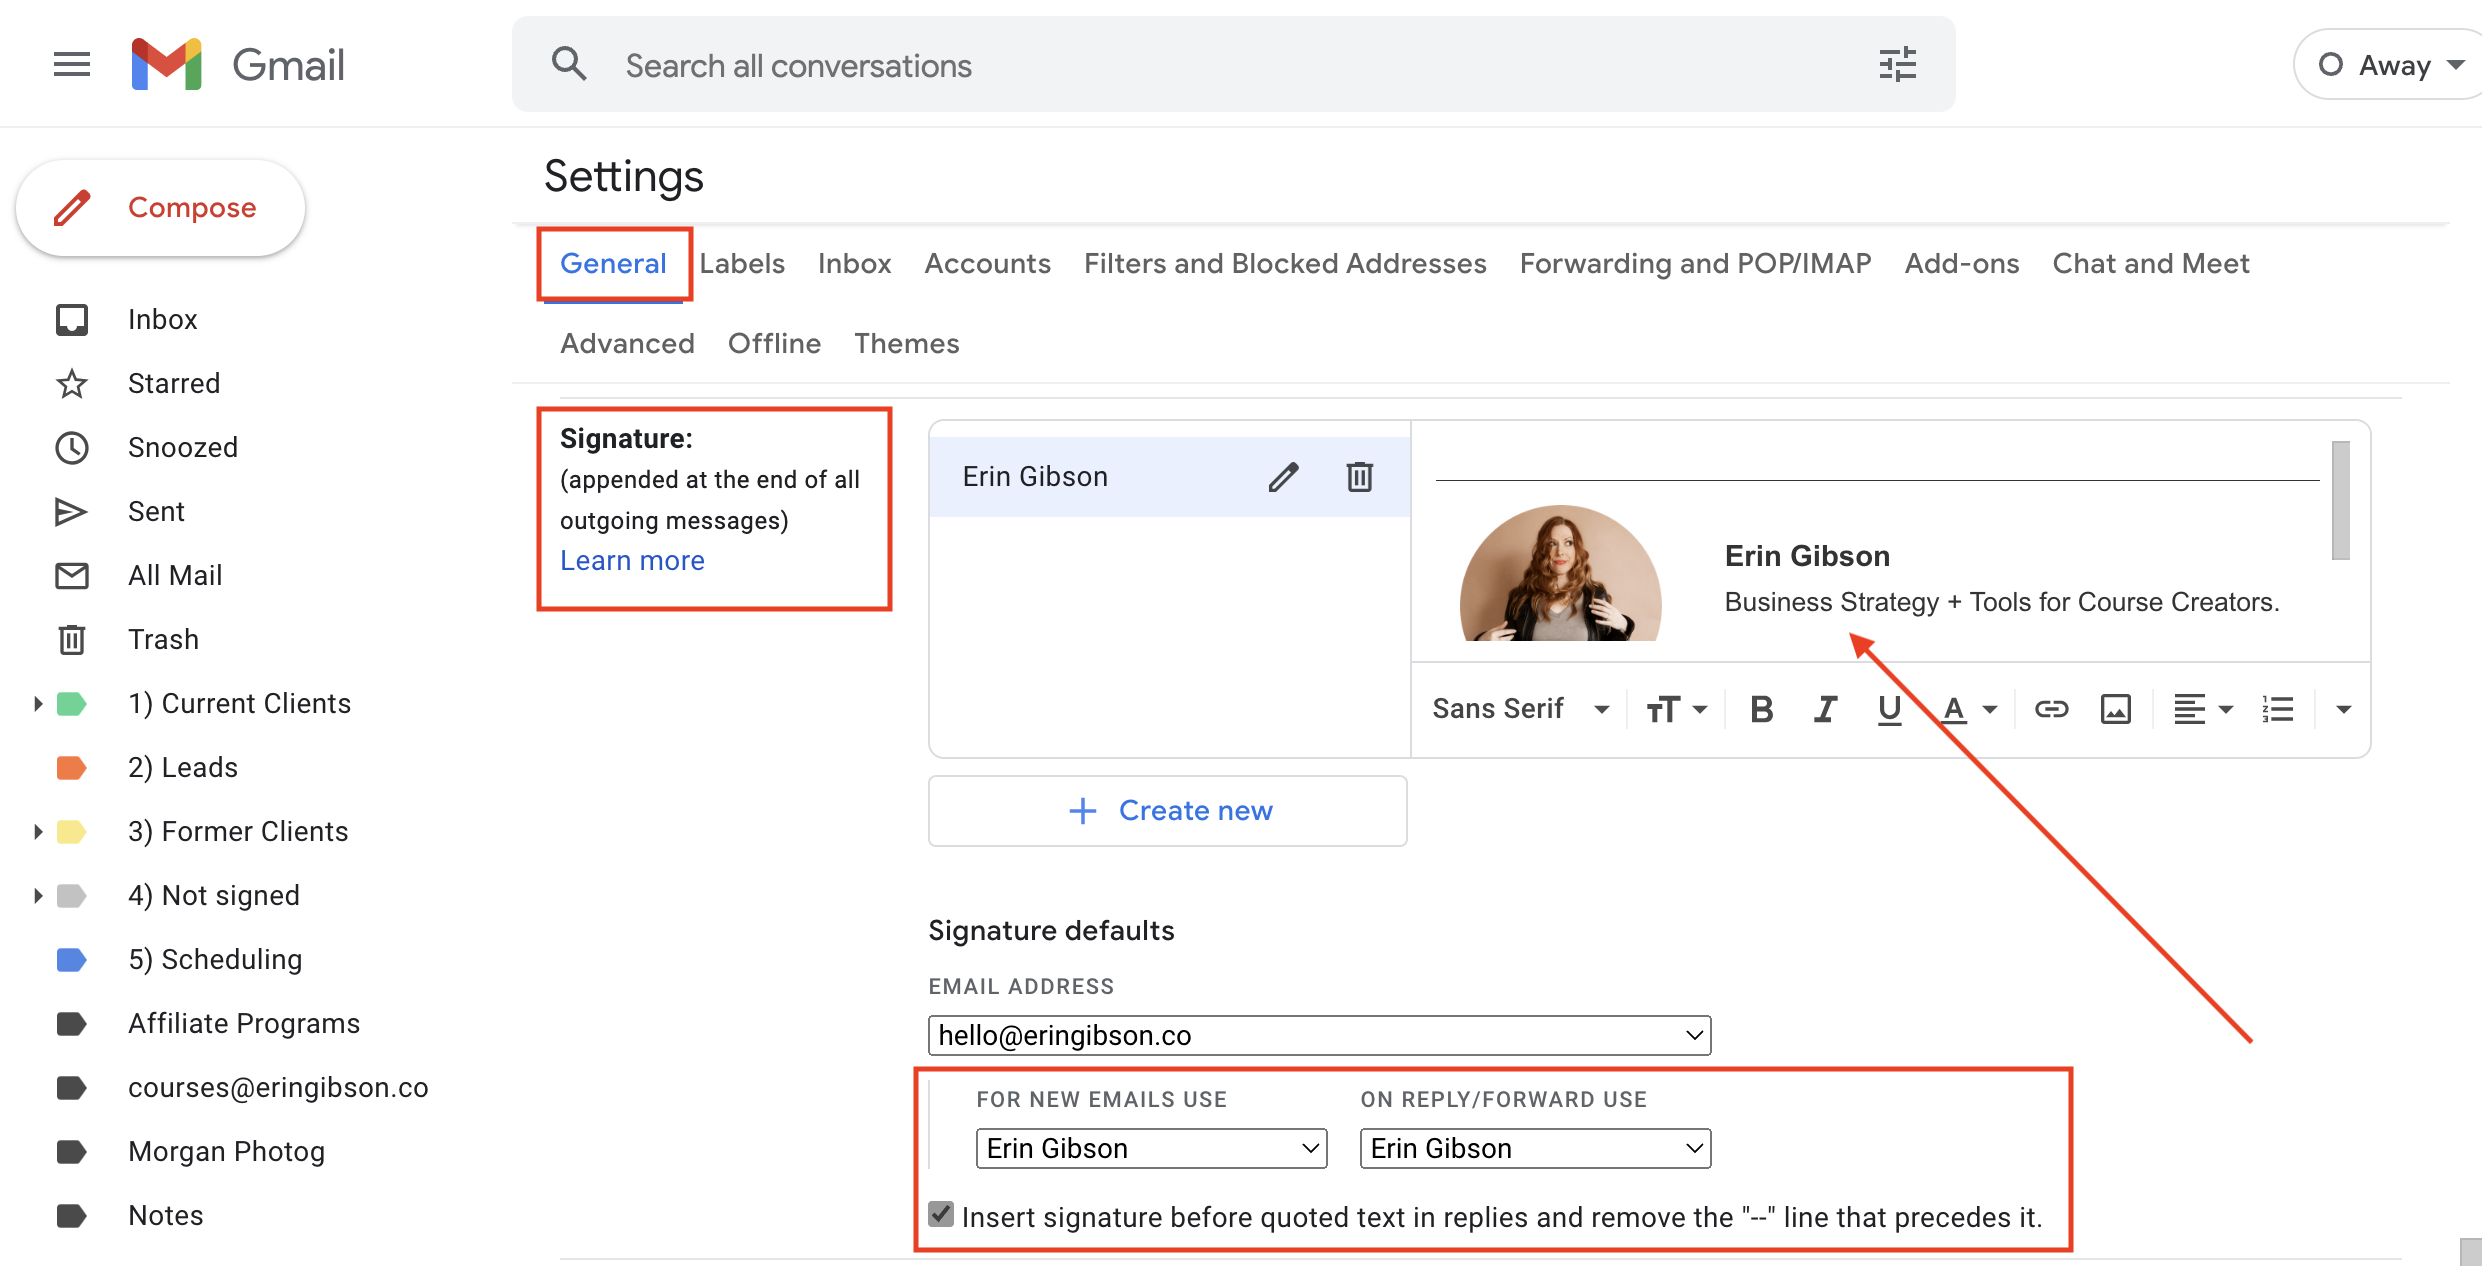
In Gmail, go into Settings > General, find the Signature section near the bottom of the page, and paste your new signature into the box. You’ll also want to configure the Signature defaults underneath. When you’re done, click Save Changes at the bottom.
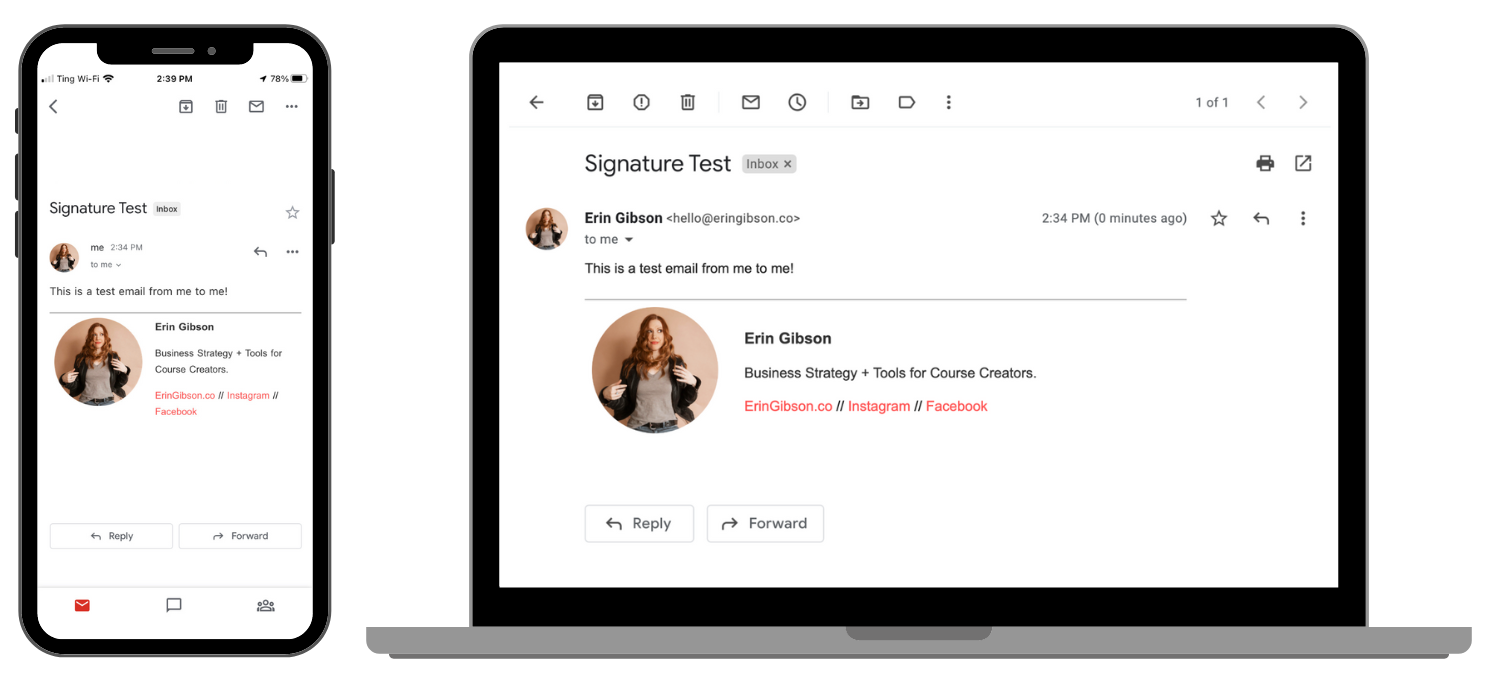
6. Test your new email signature on desktop AND mobile!
Send yourself an email and check your signature on both your computer AND your smartphone.
Tables are not ideal for mobile devices, but they’re the only way to do this in an email where mobile-optimized CSS isn’t an option. You may need to tinker with the width of your table or columns to find a layout that works well on both.
This is how my signature appears on a computer vs. smartphone. You can see why simplicity is important for the mobile version.
There you have it! No signature generator needed.
Mailbox a mess? Check out 7 Gmail tricks to get your inbox squeaky clean!


